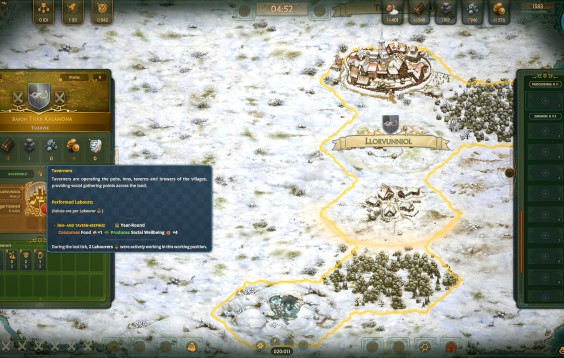
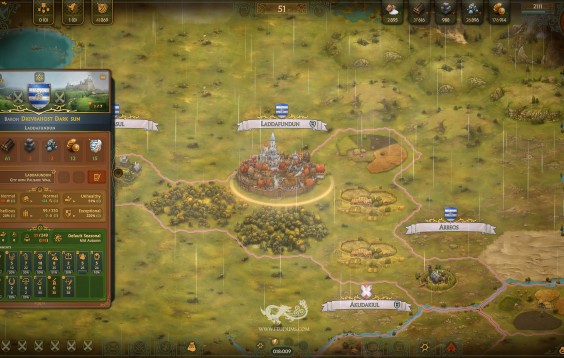
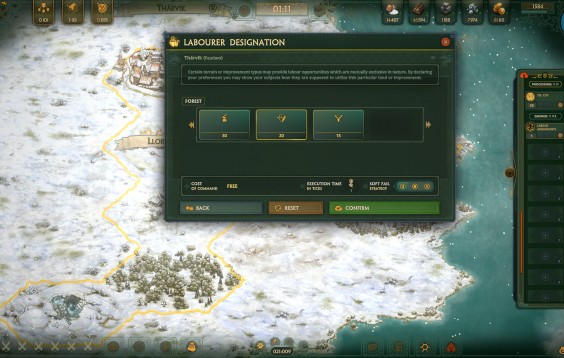
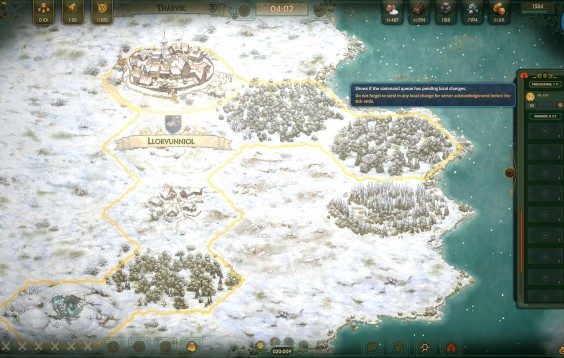
A Guide to 0.4.1759 (Public Economy Demo)

6 posts / 0 new
Last post
Mat
administrator
Mat's picture
A Guide to 0.4.1759 (Public Economy Demo)

Hey,

As the game currently lacks some important tutorials - scarce resources to be blamed - I thought it would be best to give a few pointers for a smoother start. Its better late than never.

This is kind of an "unofficial" official tip & tricks for the 0.4.1759 build.

I deliberately chose to put the tips here rather than in an article as I would encourage everyone to participate. Feel free to add your questions or post your own tips and insights here!


Shortcuts:

  1. Pre-Game topics
  2. Game Sessions & Game Design topics
  3. The Map UI & Shortcuts / Key Bindings
  4. Tips, Tricks & Some Gameplay Hints


Content last updated: 6/19/2021

You may also look for help on our discord channel, which you can find just to the top left of this forum topic. You don't even need the discord client to join as they also have web access.

Mat
administrator
Mat's picture
Pre-Game

Pre-Game

Registration

If you're a newcomer, you will want to know that you can use the same account on the website and in the game - it is in the description of both layouts -, so please don't duplicate it. You can create your account on either the site or in the game.

If you're creating your account through the site, you'll receive a verification mail from @feudums.com with an activation link (it should be delivered within a minute or two, so if you don't see it, check your spam folder). Don't forget to activate your email address because you won't be able to log in until that is complete.

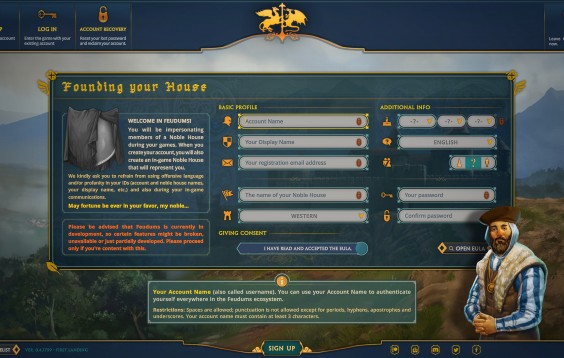
Creating the account through the client will automatically log you in at the end of the process. I personally would suggest creating an account this way as you can set more details there - like the default culture of your Noble House - during the registration process, and well, because you probably would like to play the game anyway. :) The client is also more convenient to find out early if your account or house name is already taken.

Registration through the Client
In-game Registration - click to enlarge

Your Profile

You can see and update your profile in the client, just head to  Settings  in the main menu. You can also update or reset your default in-game culture, your gender and date of birth here (these latter are optional data, but be advised that some game modes might be inaccessible unless we can identify your age. This is for the security of younger players), and you can see that your Hall will automatically adapt to your changes.

Settings in the Public Demo (1)
Settings and button to Coat of Arms Editor - click to enlarge

Some of your details can be also edited through the website. To open your profile, you need to click on  <Your Name>  on the top right corner.

House Coat of Arms

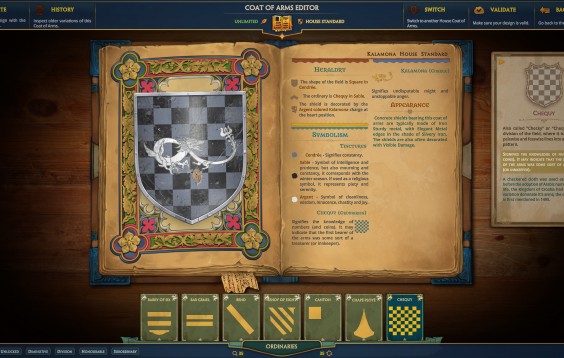
There is just one mandatory step left after your succesful registration. To unlock the ability of playing on a public game world, you need to set the Coat of Arms of your Noble House. Coat of Arms are like IDs in the medieval world; they specifically identify your House, and later, your characters (sometimes we use the term Persona, which specifically refers to a player character), so they have to be unique and have to be set before you can rise your banner on a map. You can do that by heading to the  Settings  in the client and then clicking on  Open Editor  button; it'll lead you to the Coat of Arms Editor. Take your time to setup a House Coat of Arms as it'll represent your House in the future. We have added heraldic tips and descriptions to each heraldic device, so you can kind of create a "backstory" for your house by simply choosing an appropriate variation. :) There is also a complete article covering the editor, which you can find here.

Don't forget to click on  Set / Update  (depends on context) after you edited your Coat of Arms. Now, your Noble House is ready.

Coat of Arms Editor in Public Demo (1)
Coat of Arms Editor - click to enlarge

Finding a Game

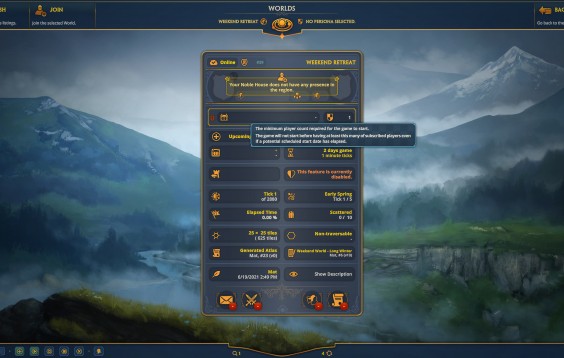
It's actually quite straightforward. You just need to open  Worlds  in the client. On this screen, you can see the registered game sessions and you can check their most important details on their cards (note: you can filter out unwanted cards using the filters on the bottom left). Normally, you need to look for games that are Public and are either in Upcoming or Running state. The difference between an upcoming and a running game is that upcoming is still waiting for some starting criterias (such as minimum number of players or reaching a specific date; you can see the exact criterias on the card) to start.  You can join upcoming games and setup your first commands in advance. 

If you see VIP games, those are restricted for those who have an invite for those games; these are usually closed tests for our Vanguard community, however in some cases you can request an invite on our discord channel. At this point, though, there should always be an upcoming or running public game.

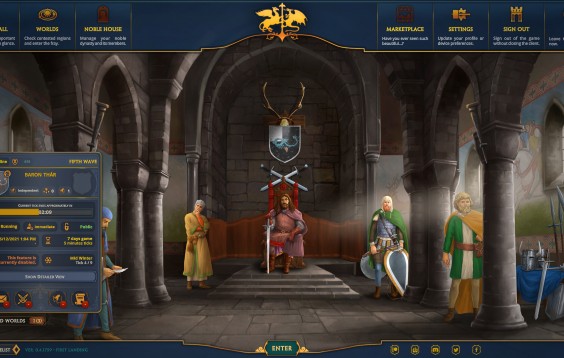
Tip: if you already have subscribed games, you'll see a minified card for all subscribed game worlds on your Dashboard. You can check their "snapshot" details or join to these game from there directly.

Worlds Scene in Public Demo (1)
Worlds (Filtered to Running Games) - click to enlarge

If you're at work or you would not like to run the client only to check the games, those are also visible on our site. Just head into this section (Meeting Hall) and you can see a box, named "Server Availability" on the left. "Core Services" is pretty much what it stands for, beneath it, you can see the list of the accessible "Games". These are color-coded for access restrictions; if you see green games, those are open for everyone. Yellow ones are VIP games. There is also a "lightbulb" for each item - so long those are green, the servers are running and are accessible over the internet as intended.

Additionally, we have an automated discord forwarder that, by default, reports any upcoming game on our discord channel, including their basic characteristics, such as length, speed or starting criterias.

Dashboard
The minified card on the dashboard - click to enlarge

Joining a Game

Joining a game just needs you to select the card in-game and from the top menu, click  Join . You'll then be asked to create your Persona, which is going to be your figurehead in the specific game world / session. You will be able to setup a different character for each game session. other than setting the in-game name, gender and culture of your Persona, you can also setup the name of your starting feudum and your capital city (you can later change these in-game), and you can also slightly personalize the Persona's Coat of Arms if you like, though you won't be able to change the major House CoA features for obvious reasons. :) Once all set, click on  Subscribe  then allow a few seconds for the client to communicate your orders to the underlying system. You'll get a confirmation as soon as your subscription is accepted. Then you can click on  Enter  to start your journey.

Joining a Game and Filters
Joining an Upcoming game. You can filter World Cards by their state using the filters on bottom left - click to enlarge

Note: under some game settings, map placement does not happen immediately but in batches. This is displayed on the world card; in this case, you won't be able to enter the game as soon as you're subscribed; instead, you're going to receive an in-game mail when your placement on the map has happened.


Mat
administrator
Mat's picture
First Steps In-Game

In-Game

Conceptual Basics

Feudums is a tick based, highly customizable and moddable game. This leads to two essential things:

  • The game is not real-time. In each round (called a tick), you and everyone else have a specified amount of time to gather info, make a plan and specify your commands; then the game server will execute everything in the proper order, update the statuses for everyone, and send out the tick report for the next round. Rinse and repeat until the game is over. If you like, you can read a bit more about the background and its advantages here (though not everything - like animated Recaps - is added to the game at this point).
  • Each game may have very different settings and setup, including different in-game rules. The most important ones are on the world cards, the rest you can only gather - at the moment - in-game. Therefore, there is no easy "generic best strategy", only strategies that work well under certain settings. The core concept however does not change, so knowing that might give you the necessary info to come up with your personal plan.


Game Map

  • Each map (usually seed-generated by a fully moddable logic) is built of tiles. Even small maps consist hundreds of tiles - the biggest ones are built from around a million. A map can either continuous (traversable) on none, one or both axes, but in the current build, it does not make much difference. Tiles are the smallest distinct terrain elements on a map and can be claimed by players or be neutral (unclaimed) territory. Each tile has a terrain type (like desert, forest, hills, lake, etc.) and most can be a host for an improvement. Some terrains can be altered (replaced by) another if the player wants to.
  • Improvements are structures built on a tile, such as a farmland, a village or a castle. They offer "specializations" on a tile. Some improvements only have a single level, while others can be upgraded multiple times and would unlock additional options. Also, some improvements may offer housing capacity to the local population.
  • Both tiles and structures can have upkeep and they can yield resources, and additionally, they can offer labour options. Multi-level improvements usually have their upkeeps and yields changing on a per level basis).
  • There are also rivers on the edge of the tiles; those can give economic bonuses to their host tiles.
Note: As a rule of thumb, every rule and each parameter related to tiles, improvements and rivers are fully moddable, but the core relations between tile, improvement and labour are not.

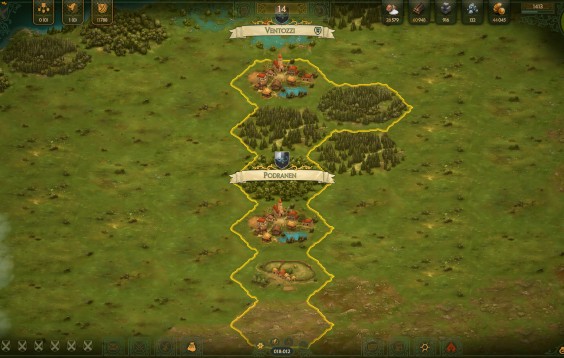
Screenshot from Public Game
The game map (zoomed in) - click to enlarge


Seasons

Season IndicatorEach game has a calendar (with seasons and season periods) and defined agricultural periods and dates. You can always see the current season (and its period), also all the remaining periods and their length on the top right corner of the UI.

In the Economic demo, seasons mostly affect labour.

  • Some labourer options are only enabled in specific seasons or periods or they offer different labour (and output) in different seasons.
  • Currently, crops and herds have the most detailed seasonal settings with multiple, season-based labours and agricultural periods, breaking their life-cycle to multiple stages. Crops need to be planted, nurtured and harvested in specific periods, while herds need to be bred, tended and slaughtered. Other than slaughtering the animals, there are also seasonal options for producing materials from a herd without  sacrificing the animals - like shearing sheep or producing dairy products.

Normally, you don't need to micromanage any of these events - assigned workers will automatically work according to these periods and settings.

But seasonality is still an important factor as it will allow you to redistribute workers while a specific labour option is dormant. You can determine your priorities - or focuses - on a seasonal / season periodic basis. We'll take a few more words about these options in the Economy section below.

Tip: you can always hover a labour option to see if its seasonal, and, in that case, what they will do in different seasonal periods (including the exact requirements and outputs per labourer).

Labour Details
Hovering a labour slot will show the details - click to enlarge

Seasons also passively affect your population - usually, people are more willing to travel (immigrate or emmigrate) and the birth/death rate is also better during warmer seasons, while winter is generally the hardest period in respect of both, and seasons also have some modifiers for the health of your people. We'll talk a bit more about this later.

Note: It might not come as a surprise that the whole calendar is fully moddable. There might be games where specific seasons are dominant, or some - or some of their periods - are missing. Agricultural periods and events may also change, howerver, in normal game modes, they will normally represent a more-or-less balanced, 4 seasons calendar, based on the climate of the medieval continental Europe.

Labour Exclusivity
Disabled options are marked both visually and in their hover details.

Economy

Note: Economy - including labour options - is fully moddable. Specific values might differ from game to game, but you can always refer to the tooltips and the information cards, as they will inform you about the exact values. Labourers can also be turned off entirely - providing a more casual and less granular approach to the game -, however, such a change is always noted specifically on the world card.

Resources

There are multiple main resources in Feudums, including materials (stone, timber and iron), coinsfood and virtue. Materials are typically needed for building, food is used to feed your population. Virtue is a more 'spiritual' resource, basically representing the prestige, might, piety and chivalriness of your Persona.

In the current demo, you can gather - and spend - these resources on multiple ways:

  • Tiles and improvements have basic yields, which you get each tick as long as you own these objects and their upkeep is paid. Upkeep is also paid tick by tick. If you cannot pay the basic upkeep, the tile or improvement will not operate and its labour options will be disabled.
  • Various workers (labourers) can also produce - and consume - any kind of resource. Some labourers create resources (typically the ones like a woodcutter or a fisherman), others transform a set of resources to another set (like taverners, smithes, etc.).
  • You can buy or sell materials on the World Market. World Market follows the real supplies and demand of the players and so prices are entirely player-driven; be aware that others can influence its prices just as much as you!
  • Feudums, as administrative units, also have their additional upkeeps and yields, like they are consuming food to feed the population but are generating coins as collecting local taxes.

Feudums

In order to exploit them, tiles must be formed into a feudum, which is an economic and administrative region under the reign of a player. Feudums have soft and hard limits for their maximum sizes. Over the soft limit, the feudums will start receiving administrative penalties (realized on it's Stability register), and it cannot grow beyond the hard limit.

In the current build, a player can only have a single feudum, but they can release and claim tiles at will and those are automatically attached to (or detached from) their feudum.

Tip: you can claim additional tiles using the appropriate command, up to the hard size limit of a feudum. You can also release tiles using another command. Use these to acquire terrain types you need and get rid of the excess tiles of a specific type. Claims can be only placed on tiles that are neighbouring your lands, but be aware that if there are other neighbours, they might also claim the same territory. If that happens, the fastest claim; if there are multiple claims expiring at the same time, then the one with the highest bid will win. Claims are usually also getting slower and more expensive the more tiles you have.

A feudum will always attempt to work as a small, self-preserved ecosystem - it'll fulfill local demands before any surplus would be sent to the treasury.

Screenshot from Public Game
The Feudum Card with the selected Feudum's overview - click to enlarge

Feudums, as administrative units, also have several unique registers, like Food Ration, Tax Rate, HealthMorale, Growth Rate or Stability. These together represent the standing of your local population.

  • Food Ration is determined by the player. Generally, the more food - better diet - the people get, the happier they are. At the same time, too much food may have a negative impact on Health. If a feudum cannot satisfy a declared Food Ration, all is not lost - it will automatically try to give the next best option, and will attempt to reset to the advised Ration as fast as there is enough surplus for it.
  • Tax Rate is also determined by the player, and, as it can be guessed, have a strong effect on the Morale of the people (and an inversely proportional effect to one's treasury. You just can't satisfy everyone.). A high tax rate can also affect Stability as it may make some criminal activities more attractive.
  • Health is the general health status in the feudum, based on the somewhat primitive and very limited medieval health care system and the local pressure on it. Health may influence both Morale and Growth Rate. It's performance is generally affected by a range of factors and be advised that very big populations will naturally never be too healthy in a medieval environment, whatever you do. But sometimes, it's just acceptable. Depends on your agenda. As a rule of thumb, you can count on the following rules, though as always, exact values may depend on the settings:
    • Each feudum has a low, but constant base provided Health value to start with.
    • Density - the amount of population against the amount of housing capacity, ie. relative crowdedness of people - is a driving factor for determining the pressure. Density is calculated per improvement and is roughly averaged for the feudum.
    • Rivers and lakes (as fresh water sources) inside your feudum tend to provide natural bonuses.
    • Food Ration (diet) can either stimulate or suppress the overall pressure. 
    • Seasonal Modifiers might be also applied. Some periods are less demanding on people, while others can easily take a high toll.
    • Labourers' health contribution directly adds to the healthcare system. There are usually multiple labourer types to provide Health but the numbers of their slots are limited. Still, for any larger community, these labourers are the main source of Health. Some terrains might offer additional labourer slots for some providers.
  • Morale represents the general mood of the people and can heavily influence Growth Rate and Stability. It is a composite value and is calculated as the weighted average of how well people's basic needs are satisfied. These basic needs are represented by four groups: Health, Goods, Social and Safety. Their relative weight is always determined by the rulebook (and can be checked in the hints by hovering the Morale segment on a Feudum Card). Base needs for each are derived from the population, the weight of the given group and some other modifiers, such as, normally, Food Ration and Tax Rate can increase or mitigate the needs of some of these groups. If needs for either segment is a hundred percent fulfilled by providers, excess points are transferred to next tick. Even though their fading percentage is usually pretty high - so one can't stockpile provided scores for either segment for more than a few ticks - it can help to mitigate sudden problems for some additional ticks.
    • Health is directly calculated from the Health of the feudum.
    • Goods can be only generated by specific labourers, typically manufacturers. Goods basically represent the people's need for tools, furnitures and other artificial devices that can make their work and living more convenient or easy.
    • Social needs are representing both welfare and social security. Currently, the only providers are labour options - however, most improvement that can host a population typically also have one or more social provider job types.
    • Safety represents the people's basic need for protection. Currently, as Garrisons and hostile armies are not added to this build, Safety is provided by some labour options.
  • Growth Rate determines whether the local population is increasing or decreasing. It has two major factors: migration (either pull or push) and death / birth rates. It directly influences how many extra population will pop up or leave the feudum in a tick.
    • Migration Pressure & direction is generally calculated based on the rate of job vacancies or unemployment, the current morale and the season (as it's generally much harder to travel in certain periods). Other factors (such as the generic willingness for migration, the scale of migration, and so on) are coming from the rulebook.
    • Birth / Death rates are calculated based on density, health, and seasonality. There is also a base birth/death rate and scale defined in each rulebook. Also, the population, by default, can never go below a rulebook-specified value.
  • Stability measures the level of authority the liege has in the feudum and also the people's loyalty towards the current administration. Every feudum has a base stability based on the current morale and population, and pressure is added for the growth rate (a major change in population always poses a threat to stability), unemployment rate, tax rate and also for oversized (beyond the soft max size) feudums. A high stability currently has the benefit of a very efficient administration, whereas low stability leads to corruption and inefficiency: both can affect all upkeeps and yields in a feudum.
Tip: Density, by default, is only calculated on Settlements. Other improvements simply do not have enough houses to be densely populated on a comparable level. However, watch for settings as this might be different in some games.

Labour Work

Your population can be assigned to various jobs, through options provided by your terrain and infrastucture (tiles and improvements). Labours may come in various forms.

  • Essential workers are typically just gathering basic materials based on terrain or infrastructure-granted basic options (like woodcutters, stonemasons, miners, hunters or fishermen). They are usually not seasonal works, except for those related to food gathering, such as fishing, which might be unavailable in some winter periods.
  • Labours related to the medieval light industry or advanced labour and manufacturers typically transforms a set of materials to another set of materials. Sometimes these providers generate score for the Morale Segments, which is usually the most important method to provide for their needs.
  • There are also labour options that are not generating anything but rather preserving special items, such as herd animals or crops.

Labour Designation (Exclusivity)
Labourer Designation can be set for each tile with mutually exclusive options - click to enlarge

Some labour options can be mutually exclusive. This basically means that the player must choose which option shall be unlocked, while the other cannot accept workers. This typically occurs when an improvement or terrain can work in multiple modes, like a forest can typically be used to chop woods, to serve as hunting ground for the nobles, or to gather food - but none all of these at the same time.

For each season, and for each seasonal period there are default assignments and priorities, but the player can override these through issuing a Labour Assignment command if their agenda or situation require some tweaking. Players currently can define priorities using two methods:

  • by Guaranteed Workers; they can request that a certain labour be always provided at least x % of workers (compared to the available slots) and
  • by Working Priorities; each labour option may have a priority compared to the rest of the options.

The administration will always attempt to satisfy both kind of regulations at once. First, it'll assign workers for the items that have Guaranteed Workers, starting from the top priority item. Once all Guaranteed Workers are assigned, it'll also attempt to fill each active labour options with workers based on the items' working prioritiy.

Labour Assignments
Labour assignments can be tweaked for each period - click to enlarge

Tip: you can see the seasonal periods and most important dates marked on the seasonal calendar provided for the Labour Assignments command. Seasonality and exclusivity are also marked in the hover tooltips of each labour option.


Issuing Commands

Players must issue commands to let the game know that they want something to be changed, such as changing settings for labours, feudum rules, or the farmlands; claiming or releasing a tile; to build something, etc.

A player can add multiple commands at once, placing them in a command queue. Both commands and queues are context-sensitive.

For the moment, each player has a domain-wide command queue for domain level commands, such as trading, and a feudum command queue for their feudum. The size of the domain queue is currently constant (though as for everything, its value depends on the rulebook); while the size of the feudum command queue starts from a base value, granted by the presence of the local administration of the feudum, and additional slots must be earned by developing the feudum (most tiles and improvements grant one or more additional queue slot for their feudum). Queues, by default only have a single processing slot, which means only one command in a queue will be executed in a specific tick. However, processing slots can be also earned, so a very developed feudum can sometimes run and execute multiple commands at once.

It is very important that command queues are not sent to the server automatically. If a queue has unsaved changes, an extra icon will appear on the top left of the specific queue, with a tooltip that reminds the player not to forget sending the updated queue to the server. This is by design, because the game is tick based and players might set a lot of commands for a tick - sending all of them individually would be very inefficient and hard to follow. A player therefore must explicitly send in the command queues if they feel ready. Of course, it is completely acceptable - and possible - to send in updates multiple times per tick. The server will always use the latest version. It'll also immediately return an acknowledgement and points to any potential issue - that can be identified during a basic validation - if something would be clearly wrong about a command update.

Command Queue
The feudum command queue with a warning that it has unsaved changes - click to enlarge

The player do not need to send in queues individually. When clicking on submit, all changes from all queues are automatically sent to the server.

There are a couple other interesting or important details about commands:

  • Most commands have a price based on the context and goal of the command. It is however important that prices must only be paid when the command starts execution.
  • You can set a fallback strategy for any command. A fallback strategy is used if the command cannot be executed when it reaches the processing slot. You can set the command to, in a case like this, shift position with the next one (so maybe that one can execute and this one is given extra time to have all prerequisites set), it can block the queue (if it's important to make it happen before the next command) or it can be just aborted on a fire & forget manner.
  • Currently, issued commands cannot be changed, only repelled, if they haven't started already (they are not in a processing slot, just in the queue).
Mat
administrator
Mat's picture
The Map UI & Inputs

The Map UI

UI
The Map UI - click to enlarge

(1) - Shows the remaining time from the current tick. At the end of each tick, your uploaded commands are executed and an updated situation is presented to all players. You don't need to wait between ticks the whole process happens basically in an instant and your client is updated with the data of the new tick. Buttons around the timer are currently disabled.

(2) - These badges shows the amount of your vassals, your feudums and your virtue in this order. Currently, you can only have a single feudum and no vassals, so those won't show much. Virtue is however a resource that you can use for a few things, such as it is part of the cost for various commands. Hovering Virtue may show a breakdown of the yields and upkeeps related to this resource.

(3) - Shows the Coat of Arms of your Persona, their direct and top-level lieges. Currently, you can't be a vassal of anyone, so only your Coat of Arms is displayed.

(4) - These badges represent your treasury. Resources here are your supplies, basically the accumulated surpluses from your feudum. Hovering any of them may show a breakdown of the yields and upkeeps related to the specific resource.

(5) - Here you can find the season indicator and the current tick (and the progression of this game session)

(6) - Shows the tile coordinates of the current selection and the kind of selectable sub-items being available on the position (like tile, feudum, units or other tokens). By clicking on any of the sub-items, the focus changes to the selected item.

(7) - The information card of the current selection. If there are multiple selectable items on the current position, this will change as you change your focus. The information card is intended to show an overview of all the important data related to your current focus. You can get further details by hovering on most information displayed on them.

(8) - The command queue and the context-sensitive commands that belong to the current selection. Currently it's either a dominion / persona or feudum queue; commands will vary depending on the kind of selection (different tiles and improvements can have different commands). In the queue, you can see the number of processing slots you have (always on top of the queue and highlighted with a different border) and the queued up commands.

(9) - The administrative corner of the UI. The small cloud icon opens a control panel which shows the current state of your connection to the core services and the game world, and toggles to the Sound / Music Panel, the built-in bug reporting tool or your in-game messages. The big button with the carrier pigeon is probably your most important button: you can send in your commands by pressing this button.

(10) - The first two buttons are curently disabled. The third can be used to toggle hexa borders on the map layout, while the last can open a menu. Using the menu, you can leave the game world (it will not unsubscribe you from the game!) and get back to the main menu.

(11) - Currently, the only active button is for World Trade. Here, you can setup your trade commands for buying / selling materials from the World Market.


Inputs / Key Bindings

Mouse & Touch:

  •  Left Click  (or  Tap ) is generally used to select things.
  •  Long Press  (without movement) (or  Long Press ) unselects them.
  •   Left Click  ( Tap ) and  Right Click  (  Double Taps ) can also be used to change focus on a selection where multiple items are available - they will iterate for the opposite directions. 
  •  Right click  Moving  (or  Two Fingers Hold  Moving ) can be used to scroll the map.
  •  Mouse Scroll  (or  Pinching ) is for zooming in and out. 
  • Where enabled, you can drag & drop by holding an item by  Long Press  Moving   (note: drag & drop has a 0.3-0.5s trigger threshold to avoid accidental dragging)

Keyboard

  •  Enter  and  Escape  can be used on select dialogs to OK or Cancel them.
  •  Keypad +/-  can be used to zoom in and out
  •  Arrow keys  or  WASD  can be used to scroll the map.
  •   Shift  or  Alt  can be used to iterate selection where multiple items are available.
  •  Delete  will deselect current selection.
  •  Holding Shift  on select dialogs (and in case of numeric inputs) while using the up or down buttons can be used to add/subtract 100s instead of 1s.
Mat
administrator
Mat's picture
Tips, Tricks & Additional Notes

Game Tips

  1. There are many viable strategies for providing enough food early on. One way is to make farmland(s), but it's also possible to rely on Hunters (especially if you can claim a Forest and set exclusivity to Hunters) or Fishermen (Lakes provide the most slots for them). During closed beta, we've seen max level Settlements being fed by only Forests.
  2. Under default settings, it may worth to keep your Feudum at the soft limit and generally to aim for a 100%+ Stability. Not overstretching your lands will prevent to get the size insufficiency penalty and very high stabilities can boost your yields and decrease upkeeps at the same time.

Stability
Always pay attention to Stability if you have a chance.

  1. Claiming isn't the only way to get the terrain you want. Some terrains can also be converted to others. While it's generally slower and more expensive, it can be a handy alternative at times.
  2. While not very historically accurate, an interesting strategy is to 'move' your feudum by releasing tiles and claiming others in the appropriate direction. Don't forget that a feudum must have a Manor!
  3. Timber is an important material as it is not only needed for building things but multiple manufacturers also rely on it, and so it can be consumed fast (and you can produce scores for Morale segments from it!). Still, it is important that not spawning with a Forest early on isn't a tragedy. Even if you cannot turn a terrain you own to a Forest and you can't even claim any Forest in the vicinity, if you can generate enough surplus from anything, you can trade it for Timber on the World Market. You can also selectively give higher priority to labours that do not require timber to operate. 
  4. To obtain Virtue - which is currently mostly just important to claim tiles -, a pretty low effort solution is to change a Forest to a hunting ground (set labour exclusivity to Woodwards) for a couple dozen ticks. Multiple labours and some terrains can also generate Virtue.
  5. Try to aim for an okay-ish Morale. Always check - by hovering the Morale section - the weighting between the Morale segments and attempt to satisfy the most important needs by selectively raising priorities for the labourer types that provides for the given need. If you can afford it, you can also get some boost from lowering Tax Rates and/or raising Food Rations a bit. Be prepared that large settlements are much harder to be satisfied.

UI & Convenience

  1. Tooltips generally have a slight (0.25s) delay. This is to prevent them to appear if you're just moving your mouse pointer accross the screen. Therefore, you might want to wait a second to check if something has a tooltip. Most things do have one.
  2. You can always 'teleport' back to your feudum by pressing the Feudum badge on the top of the UI.
  3. You can filter both World Cards (on the Worlds screen) and Heraldic Devices (in the Coat of Arms Editor); filter options are generated for the appropriate context and are added to the bottom left part of the UI. 

Labour Options

  1. You can get slightly different details on labour options if they are shown on a Tile or Feudum card. On a Tile card, you can only see the options granted by that tile (and any improvement it may have), and you can also see if they are mutually exclusive as inactive ones will be drawn with an inactive background. If the same list is opened on a Feudum card, you'll also see the minimum guaranteed workers if it is set and the list will contain every opportunity across the feudum. Both will also show the planned assignments and the available slots of that kind of work.
  2. Checking a labour slot, you can see in the top left corner of each item if those are granted by a tile (a hexa icon) or an improvement (a bastion icon).
  3. Labour options can also be drag & dropped on the Labour Assignment command dialog within their own period. 

Commands

  1. Commands can be drag & dropped if their execution has not yet started, to change their priorities. Don't forget that you need to submit the commands after changing their order!
  2. If a command is related to a tile, you can navigate to the tile by clicking on the command's hexa icon.
Mat
administrator
Mat's picture
Dev Playing: The first few years

Starting Situation
My starting situation in tick 2

I usually spend the first few ticks to check the game rules (especially labourer production rates and lengths of the seasons), then I move on to trying to figure the

  1. short term strategy for gathering food
  2. determining my population goal
  3. anticipated long term strategy for gathering food and amassing something for trading
  4. determining my expansion goal

It is important in a game like Feudums to create both short- and long-term strategies. Normally, you are creating the first to prepare ground for the latter. Short-term strategies are usually more detailed, are for a shorter period, and are periodically altered or replaced as the situation changes around you.

Let's take a look at the start of my latest session (currently running). I've joined right at the start. Starting during a mild, early spring gave me plenty of time to setup my feudum and gather some food before the first winter hits, but since we started with a treasury and there is the World Market, even starting in Winter wouldn't had posed a big problem in this particular game.
 

1. Short-term strategy for gathering food

The first thing I needed to decide is what my primary source of food would be for the first few hundred ticks. Now I was lucky with my starting spot since I have multiple opportunities:

  • I have grasslands, so I could build a farm for herding or growing crops;
  • I could focus on hunters, as they are available on nearly all terrain types for free but especially in Forests, and I started with one; 
  • but I could also expand towards the water for fishing. Fishing.

Every option comes with some pros and cons. Hunters are, by the current settings, require nothing and they provide food all year. It's a hassle-free option but it has the least yield, so I'd need to designate my forest free for hunting, which would lock out its option to provide timber or virtue. It's still nearly ideal early on while our population is small, especially if I will have the time to kind of just cycle through the exclusive options, so I can have some timber, some food, then some virtue, rinse and repeat.

Fishing is also good. It is seasonal but is only dormant in the deepest of winter, so it's providing food almost year-round. It's yield is also better and a few water tiles can provide enough fishermen slots to maintain a moderate population from it. But checking the labour option, it turns out fishermen require timber to operate, so their overall price is higher. However, seasonality can also work as a plus here: I can re-assign fishermen to woodcutters in their inactive period, which could satisfy a visible portion of their yearly demand. 

Building a farm is the most advanced option; also the one requiring the most tweaking. Both farmers and herdsmen are highly seasonal so they don't always generate food - but when they do, those outputs are superior to every other option and unlike fishermen, these labourers do not require materials to operate. Seasonality, again, can be also use as an advantage: they are not always needed to tend for crops or herds , so this option won't "lock out" a significant amount of population year-round; instead, they can be sent around to do other works - such as chopping woods, working in the settlement, etc - while they are not needed on the fields.

I can also think about turning my farmland to a herds or crops-only farmland - then I don't need to have both farmers and herdsmen assigned.

Since I won't be super active in the first some hours, I decide to go with the hunters and claim another forest for chopping wood and for some shorter periods, gathering virtue (so I can generate virtue to claim my area). 

Terrains also have some basic yields, food included, but that is only enough for an initial population. Still, it's best I also calculate with these.

2. Determining my population goal

I decide to go for at least a level 4 Settlement. I don't seem to have many hills, mountains or deserts in my vicinity, so I probably shouldn't rely on stone and iron too heavily - this prevents me from fully leveling up and still be self-sufficient. I can trade some from the market, but prices can skyrocket if others won't sell a lot of these materials.

However, I might create another Settlement if needed.

3. Anticipated long term strategy for gathering food and amassing something for trading

I decide to go with Hunters as far as I can, claiming a second or even a third forest for gathering materials, or cycling them between material and food production. I also shall build a farm. I don't want to specialize it as either crops or herds yet; but I decide that I'll revisit this decision around midgame.

I decide that I will try to amass food and wood, as it just seems the logical choices, for trading.

4. Determining my expansion goal

Based on my plan, this one is fairly easy. Instead of claiming territory towards water, I'll try to claim multiple forests, or if needed, I can even turn grasslands into a forest. I will also attempt to claim my way towards both south-west and south-east a bit, so maybe I can spot a hill or mountain there. If not, I'll go full Forest+Grassland. 

I do not wish to maintain more tiles than what the soft limit is (7), but for the scouting period, I might temporarily claim additional ones, then release them if it doesn't seem beneficial to expand to a particular direction.


Results:

Screenshot
A few hours and some "expeditions" later. Feudum settings are pretty much visible on the card.

As you can see I've taken a total of three Forests - two are primarily designated to be hunting area for hunters, the third is for woodcutters. If I need virtue, I can change the designation of one of the hunting areas for a few dozen ticks to accumulate virtue.

I've also given more guaranteed workers to healers, innkeepers and night watch solots to improve morale and health a bit across the lands. 

Both Food and Timber are growing nicely.

Since higher level Settlements would require stone and even iron (and some of their extra labourers would also consume iron), I decided to rather stop at level 3, so I only need food and timber to maintain the Settlement, and I would rather build another settlement a bit later on. Also, I decided to go and claim a plains down there as that will give me +1 stone per tick, which is exactly the default stone upkeep cost of a level 4 Settlement.

Screenshot from Public Game
After another ~1000 ticks - about mid-time.

I've built the second Settlement and also built a Farm. Since I've claimed the Plains, I'm now upgrading one of the settlements to level 4. This will give a lot of extra people... but I still have the plains if I'd need a second farmland. Alternatively, I can build a Castle or an Ecclesiastical Fief there for the labourer slots they provide, but then I'd need to gather Stone from the Market.. 

The economy is self-sufficient and both timber and food are growing.

Log in or register to post comments